
You may have read about the benefits of a model-less workflow such as better cost efficiency and better production quality and your dental practice or laboratory may be looking into adopting this digital workflow. But before you do that, here are some key considerations to take note of so you know what you’re going into, and to make the switch a more seamless one.
First of all, let’s go through the whole process of a model-less workflow step-by-step, as illustrated by the diagram below.
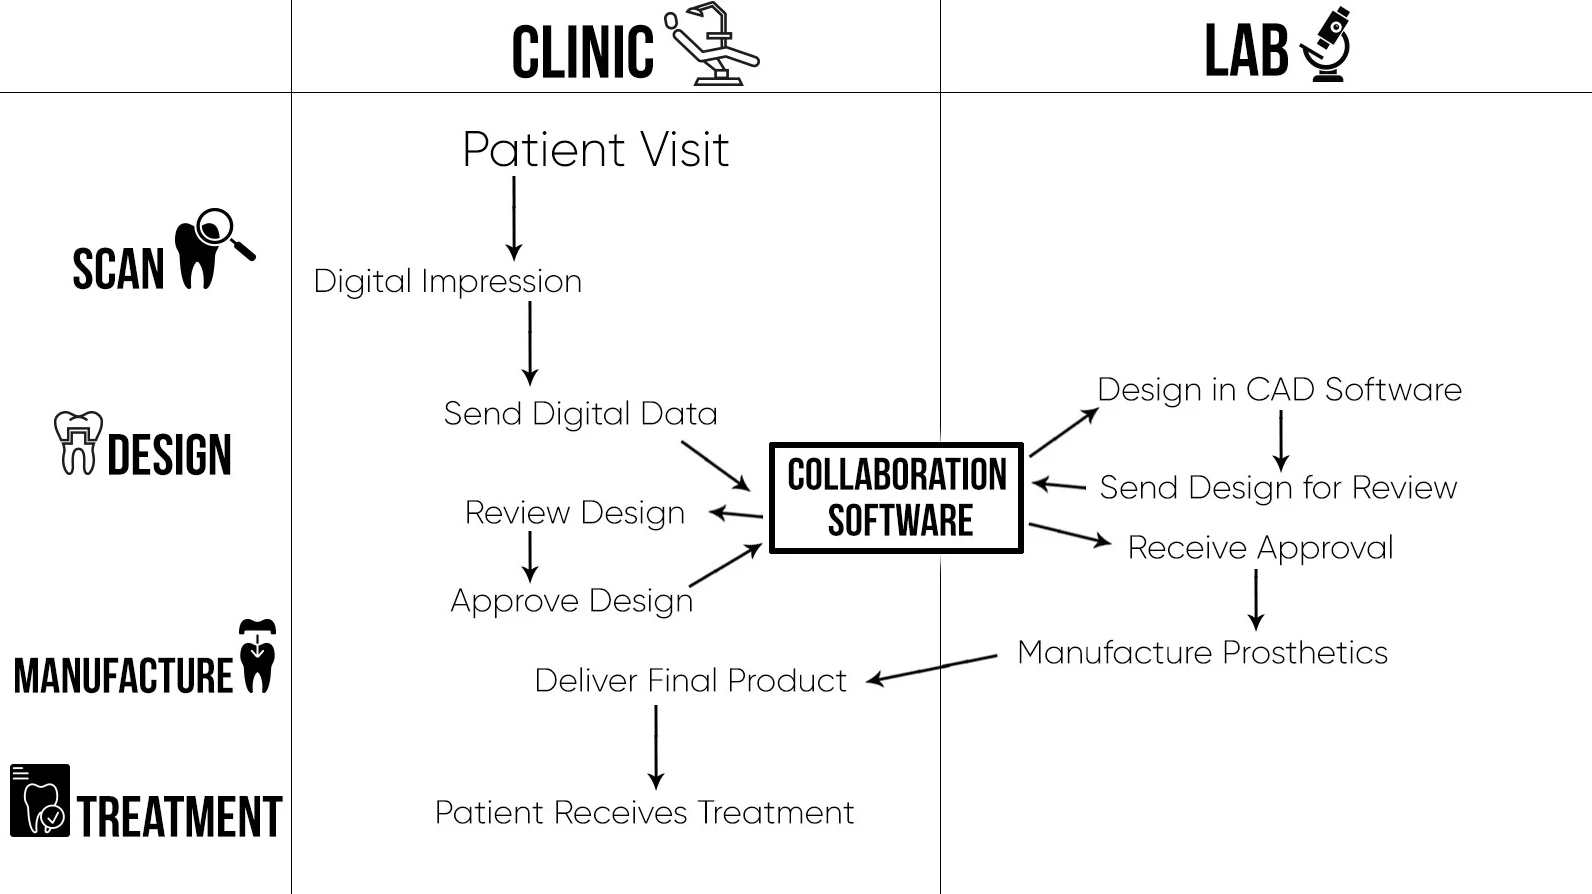
Digital Diagram
Removing the need for gypsum models saves both the clinic and lab a significant amount of time. This allows you to examine impressions quickly to identify possible errors in scanning before going into fabrication, hence increasing the quality of the resulting prosthetics. Doesn’t that sound great? But before you get right into it, here are some things to take note of!
1. Deciding on the product(s) to purchase
It is important to do in-depth research before deciding on a product, including ROI calculations. This is to ensure that your purchase will be an asset rather than a liability for your practice. Besides monetary profits, you should also consider intangible benefits when calculating the ROI such as offering better services to your patients or your clients. After making sure that this is a sound investment for your practice, you can look at studies which compare the various technology and products available in the market so you can make a more informed decision.
Now that you’ve decided to take that leap, the next step is actually implementing it.
2. Making the transition
Any transition requires adjustment time. Lab technicians may initially are on the fence about not having a model as a point of reference while dentists will need to learn how to take digital impressions. To ease into the new workflow, labs can use a milled or printed model while tweaking the design parameters to make sure their clinic partners are comfortable with the fit of the restorations before moving into a completely model-less workflow. It is important to note that the key to a successful transition requires close communication with your partner(s). Make sure to go over the first few cases thoroughly and address any concerns about the change to ensure that they are onboard with the transition.
This brings us to our next point.
3. Choosing a system
There is a wide variety of technology in the market so how do you know which suits your needs best? The most important thing to take note of here is that there are closed-systems which do not allow you to work with any components manufactured by another company. This means that if you decide on a closed-system, you will only be able to work with partners who are using the same system. To maximize the number of partners you can work with, labs can choose to invest in more than one CAD software package, pay a one-time or annual fee to access a system’s files, or use an open system where possible. The second option is certainly the more cost-friendly and flexible choice.
4. Making sure the end result fits
Finally, it is important to make sure that the resulting prosthetics from a model-less workflow actually fits. The biggest factor affecting the fit of a prosthetics is the digital impression itself, making the quality of the scan especially crucial in a model-less workflow. This means that lab technicians need to be trained to spot errors or inaccuracies in digital impressions so that the issues can be rectified before proceeding to the manufacturing stage. Again, this means that communication between the clinic and the lab is important for the success of the model-less workflow. Additionally, choosing a scanner that guarantees a high level of accuracy and quality scan data is crucial as well.
If you’re looking for an open system for your model-less workflow, check out Medit Link, Medit collaboration tool for dental clinics and labs.